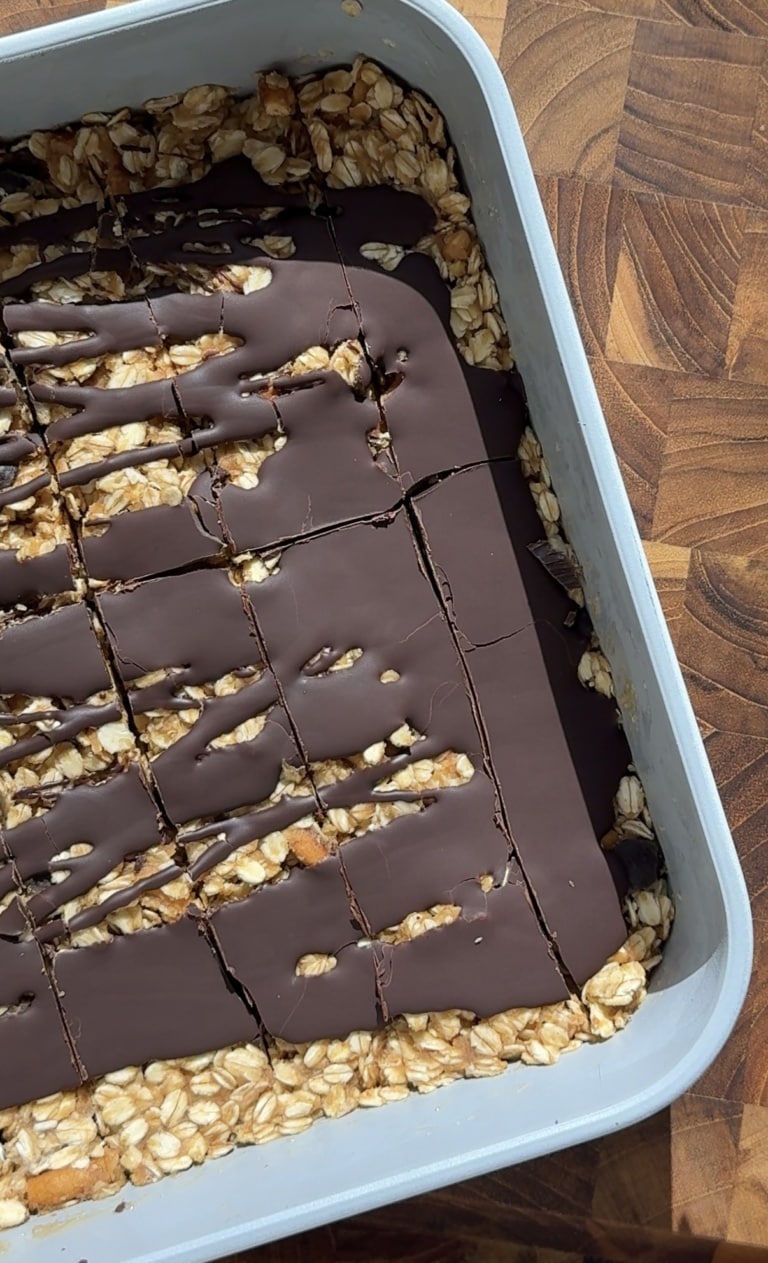
Peanut Butter Cup Protein Bars
When I meal prep, I always like to include something that feels like dessert. Sure, the dinners and breakfasts are the backbone of the week, but having a little treat stashed in the fridge makes the whole plan feel more doable. That’s where these Peanut Butter Cup Protein Bars come in.
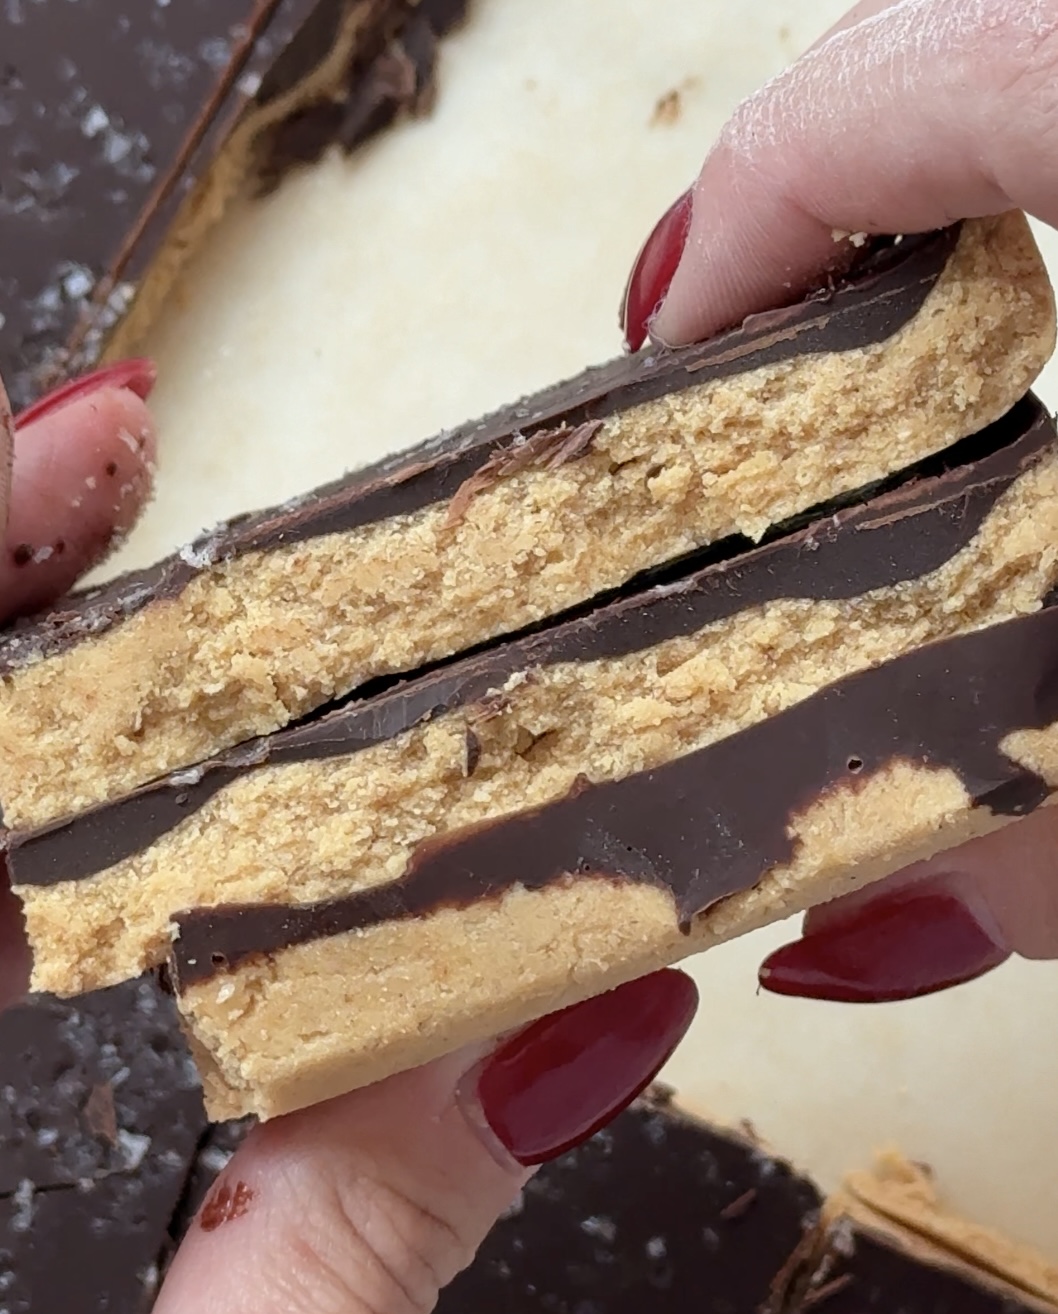
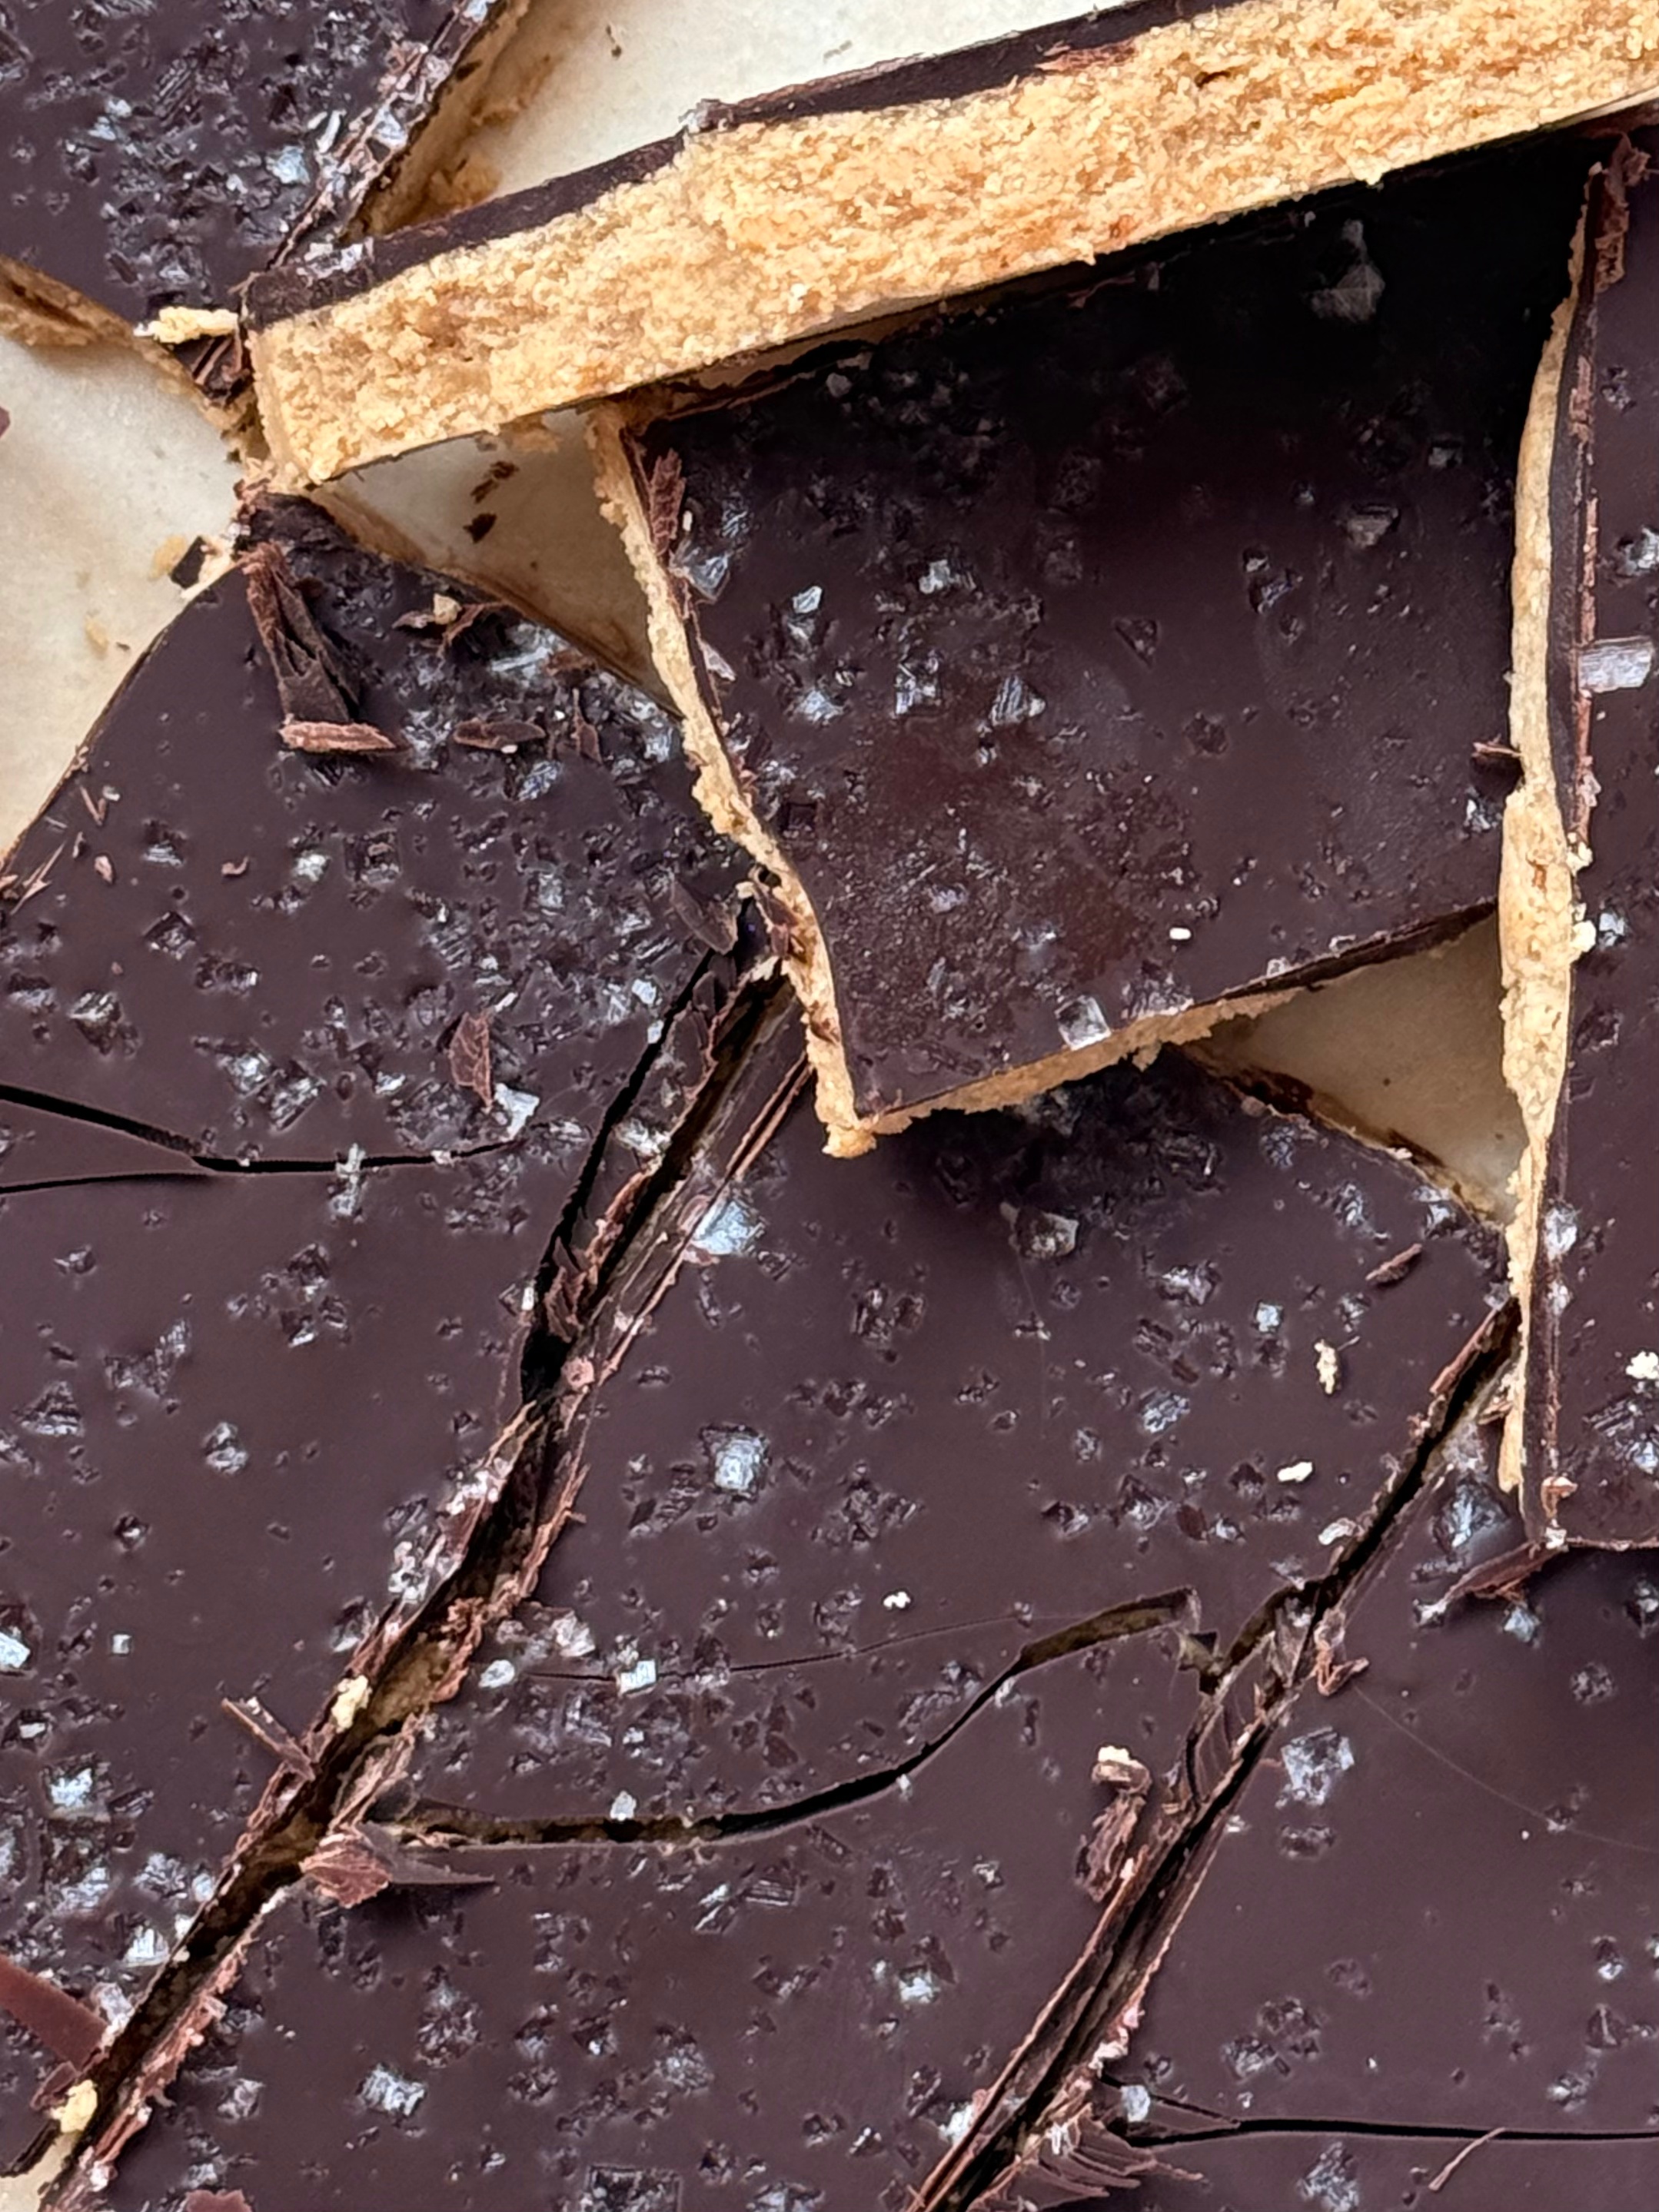
They’re rich, chewy, and layered with a thick chocolate topping that makes them taste like candy bars — but with enough protein to keep you satisfied. I love slicing them into squares and tucking a few into containers for quick snacks. My kids think they’re candy (mom win), and I think of them as my afternoon pick-me-up that doesn’t leave me crashing.
The best part? They’re no bake. Just mix, press, melt, chill, and slice. You’ll be eating one before you can even wash the mixing bowl.
This post may contain affiliate links, please read our privacy policy for details.

Shop the Tools


*You can use this gallery to link affiliate products or replace it with LTK or Shop Style widgets.
why you’ll love this recipe:
- Tastes like a candy bar but with enough protein to keep you full.
- No bake — they set up in the fridge, so no oven required.
- Customizable texture — oat flour for a chewy bite, or almond + coconut flour for something softer.
- Meal prep friendly — keep in the fridge all week or stock your freezer for later.
- Kid-approved and easy enough to make with little helpers.
Recipe Tips
For clean cuts: Run your knife under hot water, wipe dry, and cut straight down — no dragging.
Double it up: These go quickly! Double the recipe and use a 9×13 pan if you want extras for the freezer.
Texture matters: Oat flour gives you a classic chewy protein bar feel, while the almond/coconut mix is softer and more tender. Both are good — it just depends on your mood.
Extra topping: Drizzle melted peanut butter across the chocolate before chilling for a Reese’s-style finish.
Ingredient Swaps:
- No oat flour ? Swap in almond flour plus coconut flour for a softer bite.
- Nut-free ? Use sunflower seed butter instead of peanut butter — still creamy, still delicious.
- No maple syrup ? Honey works too, though the flavor will be slightly different.
- Dairy-free ? Use dairy-free chocolate chips.
- Extra sweet tooth ? Stir mini chocolate chips directly into the base before pressing into the pan.
Meal Prep Tip: These bars are one of those treats that make meal prep feel exciting instead of repetitive. I like to wrap each bar individually in parchment or foil so they’re easy to grab and toss into a lunchbox or gym bag. If you want to stock up, double the recipe and use a 9×13 pan — they freeze beautifully and it saves you from having to make another batch midweek. For an extra candy-bar feel, drizzle a little peanut butter over the chocolate layer before chilling.
Storage: Keep your bars in an airtight container in the fridge and they’ll stay fresh for up to a week. If you want to make a bigger batch, the freezer is your friend — wrap the bars individually and they’ll last for up to two months. When you’re ready to enjoy one, just let it sit at room temperature for 5–10 minutes so the chocolate softens and the texture is perfect again.
Kid-Friendly Option: Skip the chocolate layer altogether and fold mini chocolate chips into the base dough. It makes for less mess (aka fewer chocolate-covered fingers) while still giving kids the candy bar vibe.
Troubleshooting:
If your bars don’t turn out exactly how you want on the first try, here are a few quick fixes:
- The base feels too dry. Add a splash of milk (any kind works) until the dough comes together smoothly.
- The base is too sticky. Stir in an extra tablespoon of flour until it firms up.
- Chocolate cracks when slicing. Run your knife under hot water, wipe it dry, and cut straight down for cleaner slices.
- Bars crumble apart. Make sure you pressed the base firmly into the pan and allowed the chocolate to fully set before cutting.
- Chocolate layer feels too soft. Chill longer, or reduce the coconut oil slightly next time for a firmer topping.
Frequently Asked Questions
Can I make these without protein powder?
Yes! Just replace the protein powder with the same amount of flour. The bars will still hold together — they just won’t have the protein boost.
Do I need to use natural peanut butter?
Any peanut butter works. Natural peanut butter (the drippy kind) will give a softer, smoother bar, while regular shelf-stable peanut butter makes them a little firmer.
Can I use milk chocolate instead of dark?
Definitely. Dark chocolate keeps them a little more balanced, but milk chocolate makes them taste even closer to a candy bar.
Try These Recipes Next:
Peanut Butter Cup Protein Bars
Ingredients
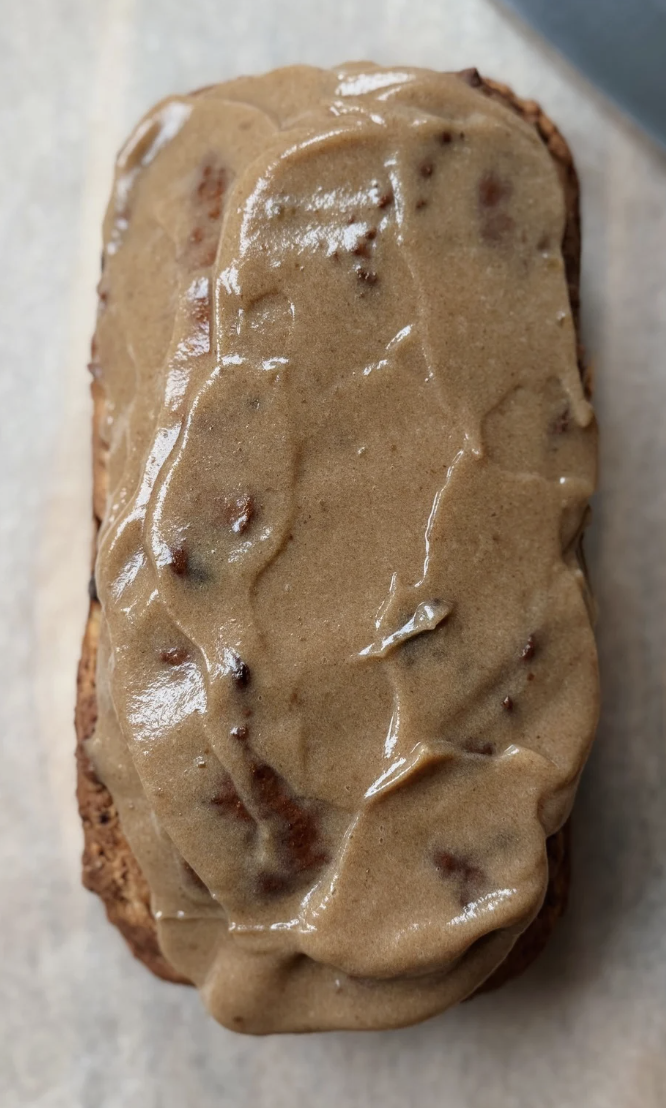
- 1 cup peanut butter
- ½ cup vanilla protein powder
- 2 tbsp maple syrup
- ½ cup oat flour OR ? cup almond flour + 2–3 tbsp coconut flour
- 1 ½ cups dark chocolate chips
- 1 tsp coconut oil
- Flaky sea salt
Instructions
- Mix peanut butter, protein powder, maple syrup, and flour until dough forms, adjusting texture as needed.
- Press into a lined 8×8 pan.
- Melt chocolate with coconut oil, spread evenly over base.
- Sprinkle with flaky salt.
- Chill 30 minutes, slice into bars, and serve.