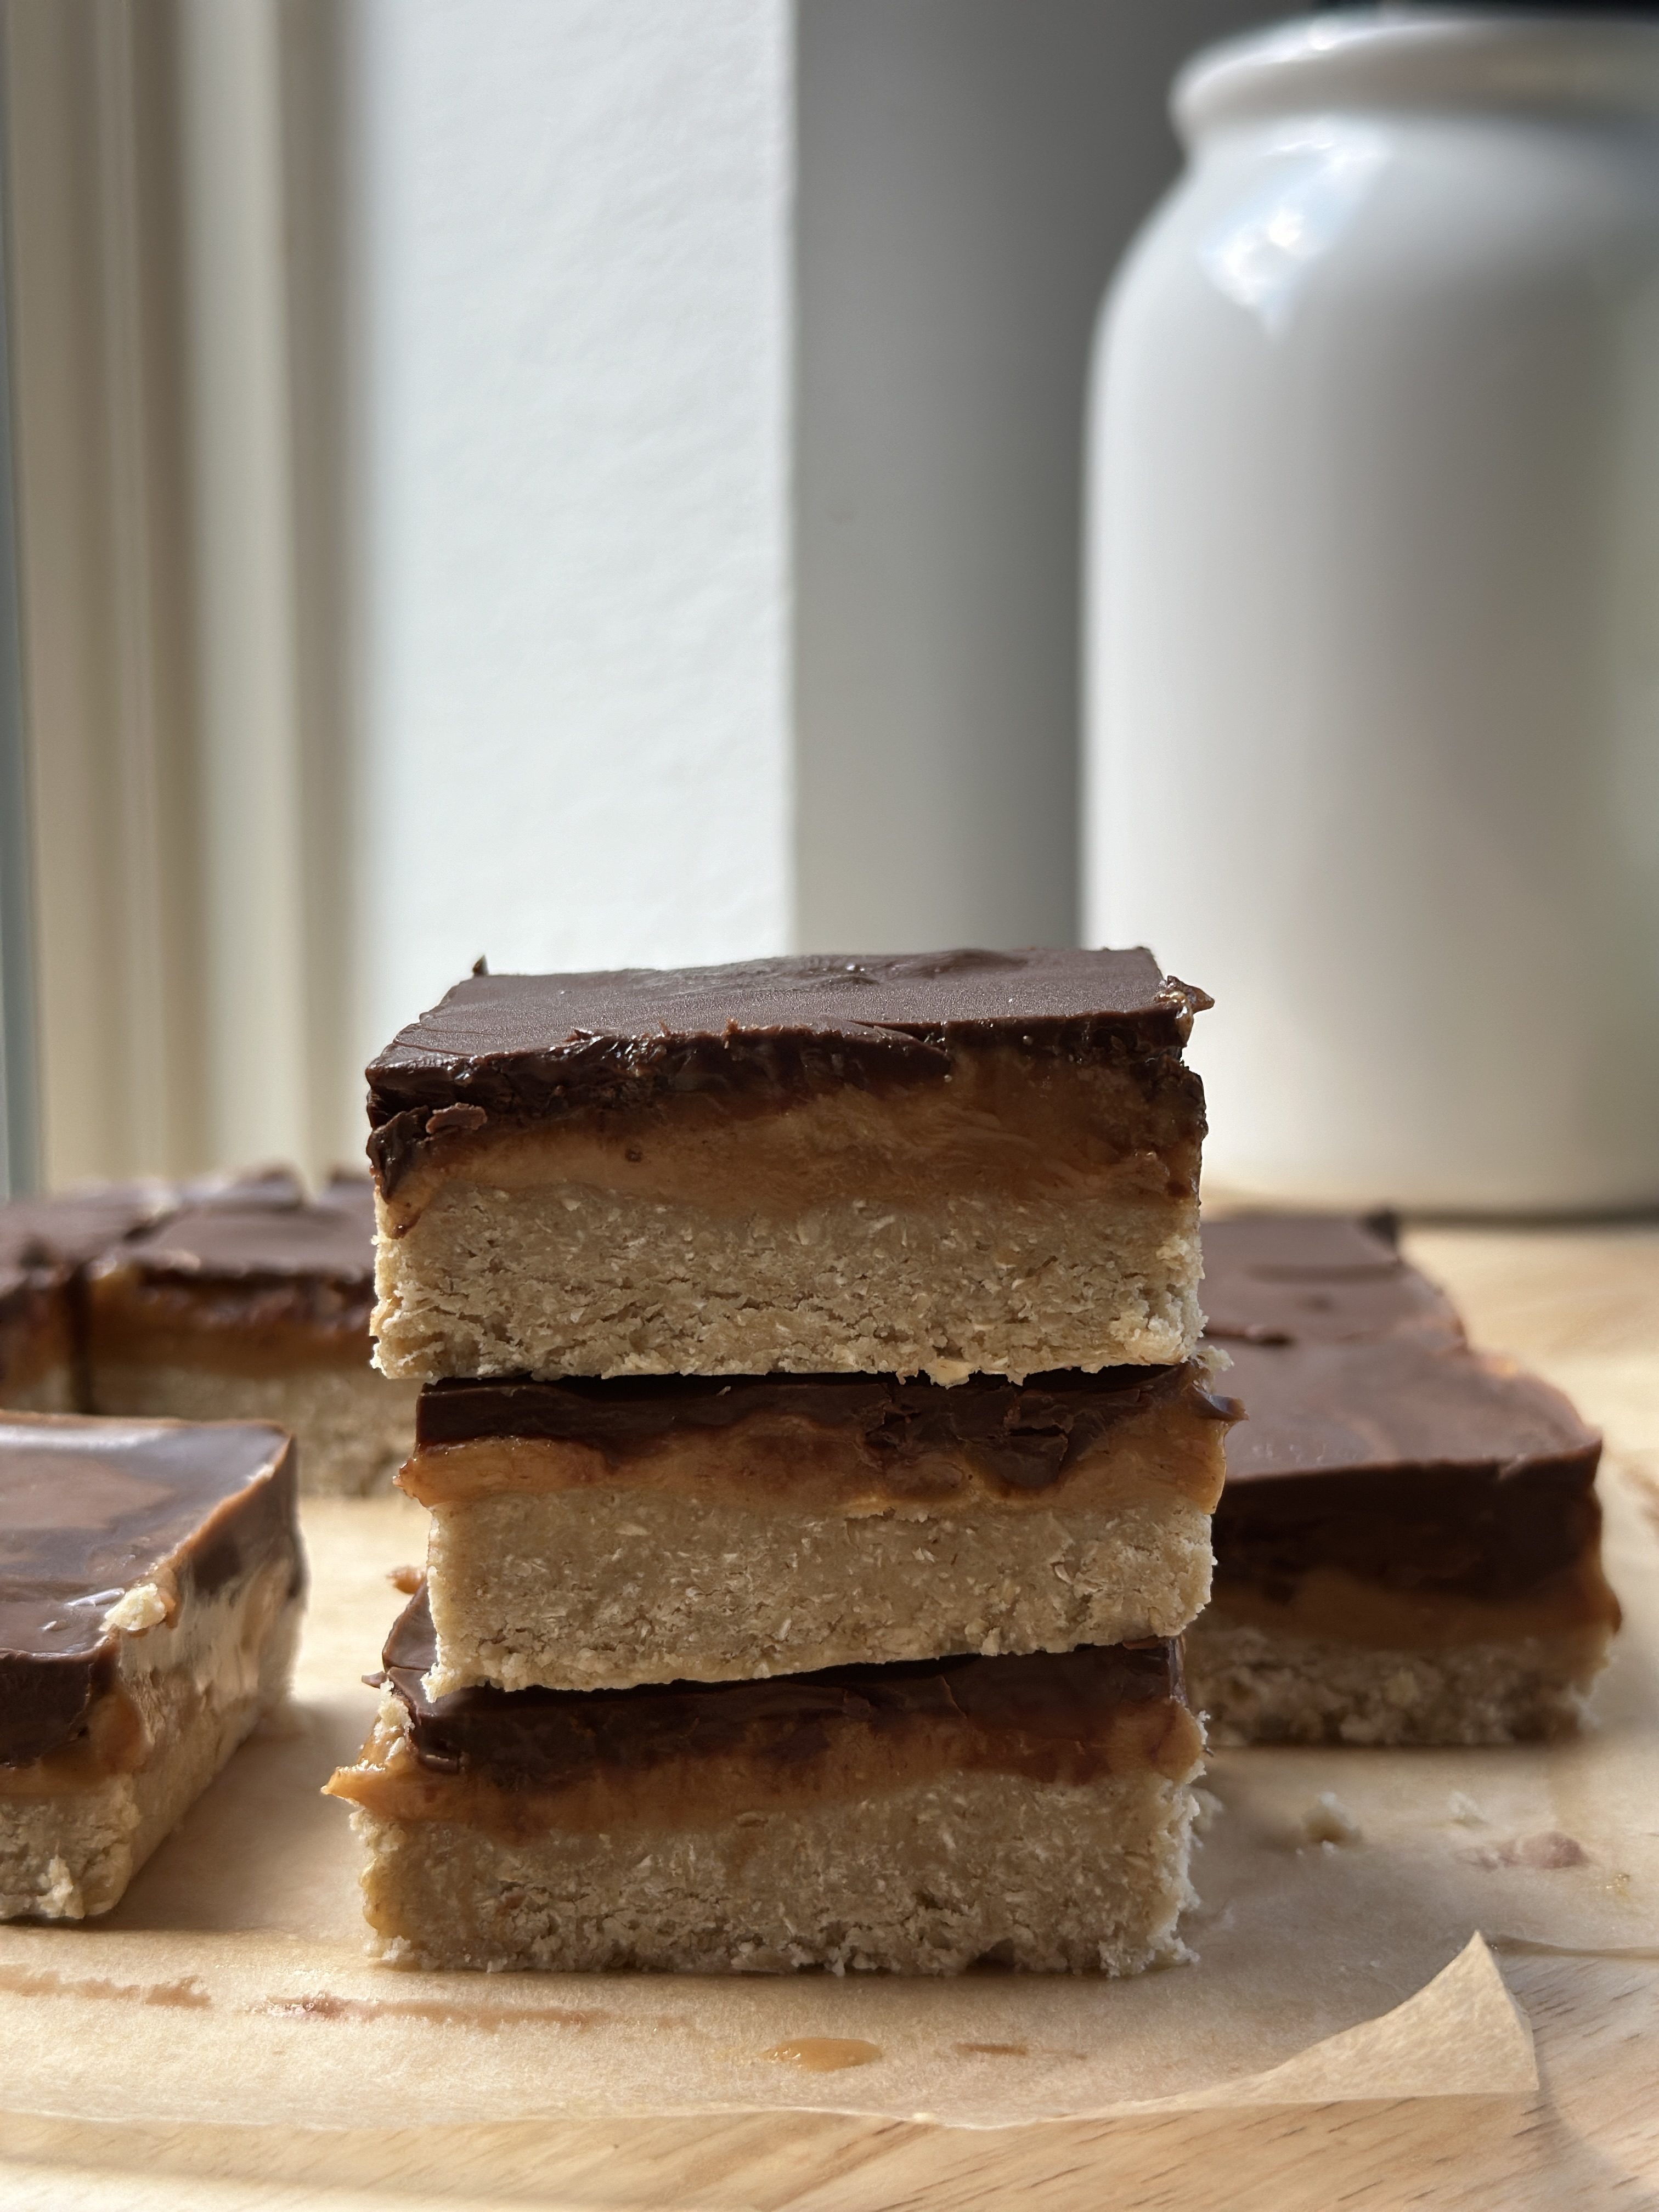
No Bake Twix Bars
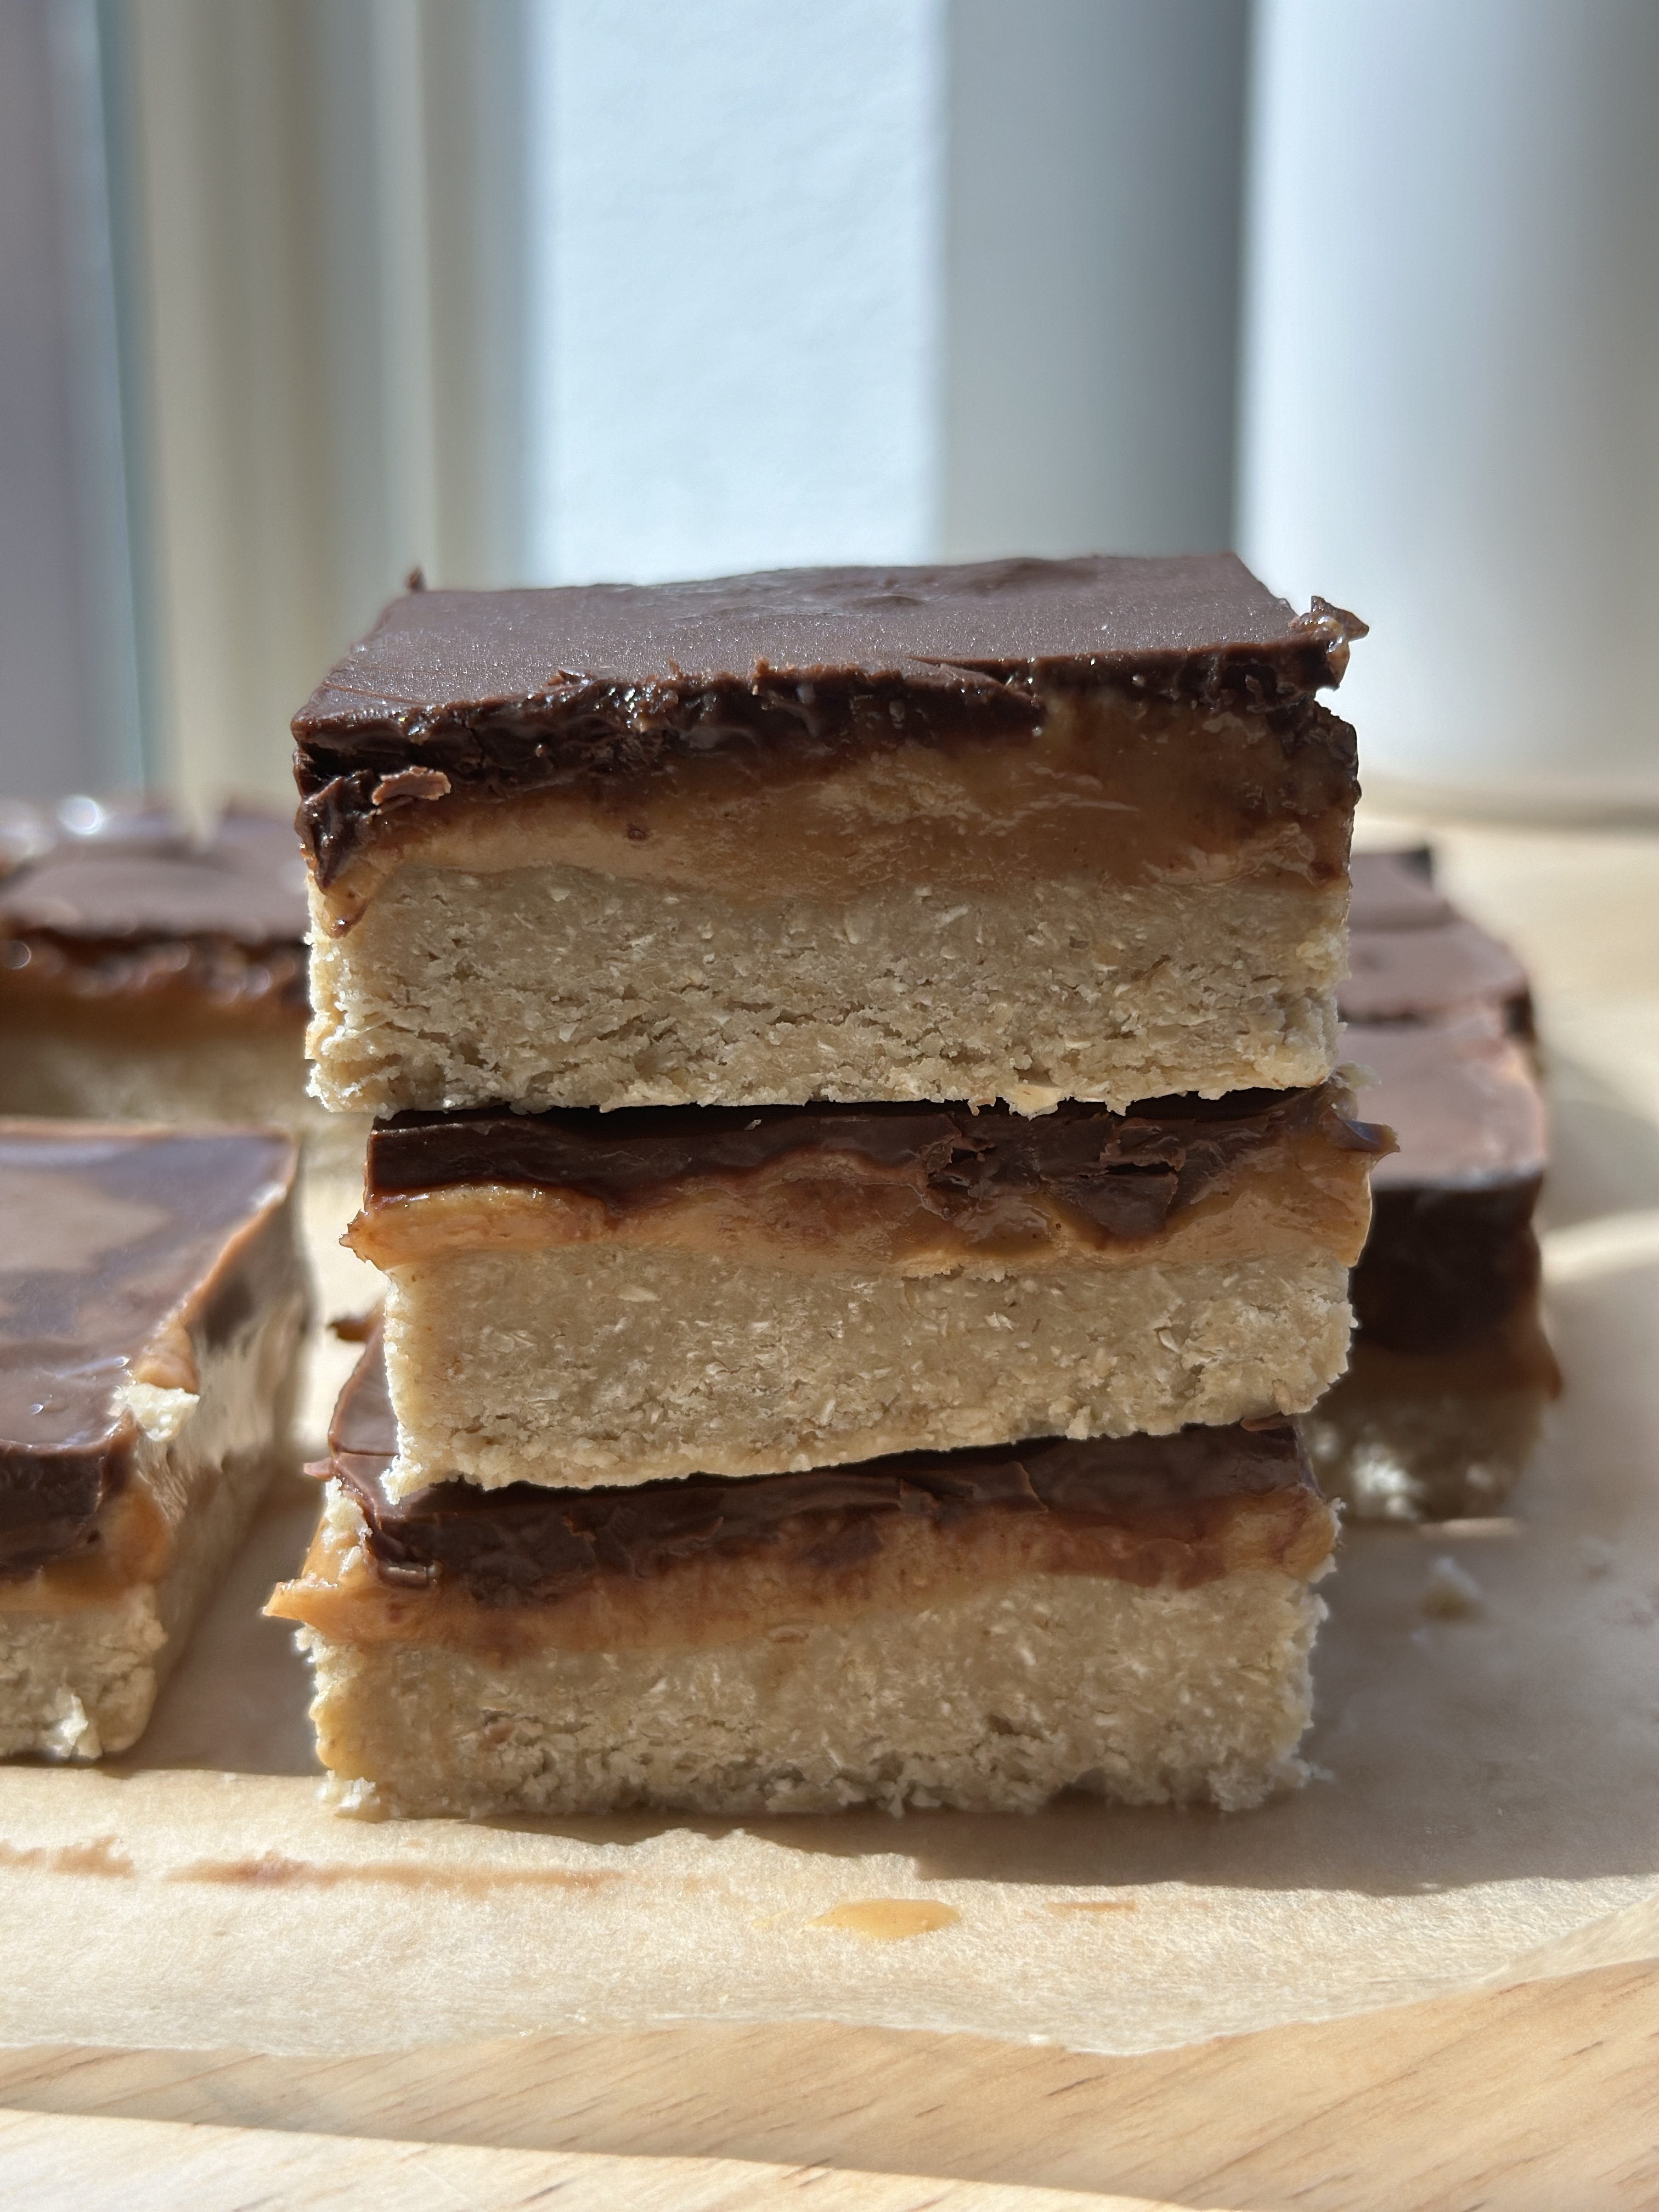
These No Bake Twix Bars are my take on the classic candy bar, reinvented for a simple, no-oven treat. With a chewy, buttery dough base layered with a rich, peanut butter caramel (I swear by Costco’s brand for its pure, peanutty flavor) and crowned with a silky chocolate topping, these bars deliver the perfect balance of sweet, salty, and crunchy. They’re ideal for when you need a quick dessert fix, a party treat, or just a little indulgence without turning on the oven.
This post may contain affiliate links, please read our privacy policy for details.


Recipe Tips
Perfecting the Dough Texture: Aim for a dough that’s sticky enough to hold together without any visible streaks of flour. If you notice dry patches, mix a little extra liquid (like a splash of milk) to bring the ingredients together smoothly. After mixing, let the dough rest for 5 minutes. This allows the flour to fully hydrate, resulting in a more cohesive and chewy base.
Creating a Uniform Base: When pressing the dough into your 9×9 pan, use the back of a spatula or your fingers to press firmly and evenly. A smooth, uniform layer ensures that every bar will have a consistent bite. If you have a small rolling pin, gently roll it over the dough to flatten and compact it further—this can help eliminate any air pockets that might otherwise lead to crumbly texture.
Elevating Your Peanut Butter Caramel: The quality of your peanut butter is key—choose one that’s natural and made solely from peanuts. This choice really enhances the depth of the caramel flavor. Before pouring your peanut butter caramel over the dough, give it a quick stir to ensure it’s mixed. This is especially important if it has been sitting for a bit, as the oil can sometimes separate. Allow the caramel to cool slightly before pouring. If it’s too warm, it can melt the dough layer and compromise the distinct texture between layers.
Achieving a Smooth Chocolate Layer: Melt your chocolate slowly using a double boiler or in short bursts in the microwave (stirring in between). This prevents the chocolate from scorching or seizing, ensuring a silky finish. Once melted, stir in a teaspoon of coconut oil or cocoa butter. This small addition can help the chocolate flow more evenly over your caramel layer and create a glossier, smoother finish. Pour the chocolate in one steady motion and use a spatula or the back of a spoon to gently smooth it out if necessary.
Cutting for Clean Edges: For the cleanest cuts, heat your knife under hot water, then dry it thoroughly before each slice. A warm, clean knife will glide through the hardened chocolate without dragging or causing cracks. If you’re cutting multiple bars, reheat your knife between cuts to maintain the smooth cutting action.
General Troubleshooting: If your dough feels too crumbly, a light spritz of water or milk can help bind it further. Conversely, if it’s too sticky, a tiny dusting of extra flour can make it easier to work with. Ensure that each layer is fully set in the freezer before adding the next. This helps maintain clear, defined layers that mimic the structure of a classic Twix bar.
More High Protein Recipes:
No Bake Twix Bars
Ingredients
For the dough:
- 2 cups oat flour
- 1 cup almond flour
- 1/3 cup coconut oil melted
- 1/2 cup maple syrup
- 1 tsp vanilla bean paste
Peanut Butter Caramel:
- 1 cup peanut butter creamy
- 1/4 cup maple syrup
- 1 tsp vanilla bean paste
- 3 tbsp coconut oil melted
Chocolate Layer:
- 1 cup dark chocolate chips melted
- 2 tbsp coconut oil melted
Instructions
- Line a 9×9 pan with parchment paper and set aside
- In a large bowl, add ingredients for dough and mix well until it is sticking together and there are no streaks of flour and pat it down into the pan
- In a separate bowl, make peanut butter caramel (make sure you’re using a good quality peanut butter- I really love Costco’s brand! Only ingredient is peanuts!)
- Pour caramel over the dough and freeze for at least 45 minutes or until FULLY set!!
- Remove from freezer and pour your melted chocolate on top and refreeze for an additional 30 minutes
- Cut into squares or rectangles (heat your knife with hot water for a clean cut- repeat with every cut)
- Plate and enjoy!!