Molten Brownie Mug Cake
Table of contents
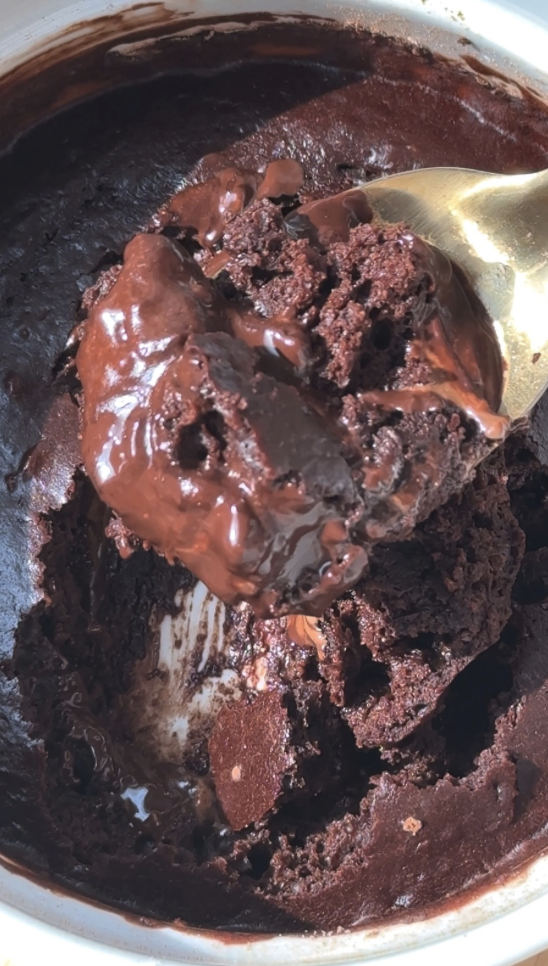
This is your emergency chocolate button. One mug, one spoon, and a couple of minutes later, you have a warm, gooey molten brownie mug cake that somehow feels way more impressive than a microwave dessert has any right to be.
It’s rich, chocolatey, and hits that lava center moment every single time. This version is high protein, single serve, and perfect for when it’s been a long day, when dessert was not part of the plan, or when you find yourself standing barefoot in the kitchen at 9:37 pm needing something cozy now.
This molten brownie mug cake is endlessly customizable too. You can make it in the microwave for speed or bake it in the oven if you want a slightly cakier edge with that same gooey center. Either way, it is the kind of dessert that saves the night.
This post may contain affiliate links, please read our privacy policy for details.


Why You’ll Love This Molten Brownie Mug Cake
• Ready in just a few minutes
• Single serve and no sharing required
• Gooey molten center with set edges
• High protein and surprisingly filling
• Microwave or oven friendly
• Easy to customize with pantry staples
If you love brownies but do not want to bake a whole pan, this mug cake is the answer.
What Makes This a True Molten Brownie
The key to a good molten brownie mug cake is balance. You want the outside just set, while the center stays soft and gooey.
This recipe uses a square of chocolate or chocolate chips pressed into the center of the batter. As it heats, the batter cooks around it while the chocolate melts into that signature lava center. Letting the mug cake rest for one minute after cooking helps the center settle into the perfect texture.
Tips for the Perfect Mug Cake
Microwave timing matters
Start with 50 seconds, then add 5 second bursts as needed. The edges should look set while the center still looks slightly underdone.
Let it rest before eating
One minute makes a big difference. The molten center thickens slightly and becomes extra fudgy.
Use a deep mug or ramekin
This mug cake rises while cooking. Leave space at the top so it does not overflow.
Oven method for bakery vibes
Baking gives you firmer edges with a molten center and feels a little more indulgent if you have the time.
Toppings take it over the top
Ice cream, whipped coconut cream, peanut butter, Greek yogurt, or a few berries all work beautifully.
Ingredient Swaps & Variations
No protein powder -> Use unsweetened cocoa powder for a rich chocolate flavor with less protein
No oat flour -> All purpose flour, almond flour, or a gluten free 1:1 blend all work
No maple syrup -> Honey, agave, or coconut sugar with a splash of milk
No butter or coconut oil -> Olive oil or avocado oil will still give a fudgy texture
No chocolate square -> Chocolate chips, peanut butter chips, or a spoonful of Nutella work great
This mug cake is very forgiving and easy to adjust based on what you have.
Storage & Reheating
This molten brownie mug cake is best eaten fresh. If needed, you can store it in the fridge for up to 1 day. Reheat in the microwave for 10 to 15 seconds until warm and gooey again.
Frequently Asked Questions
Yes. The microwave is the fastest option and works perfectly for this molten brownie mug cake. Start with 50 seconds and add time in short bursts so the center stays gooey.
The key is slightly underbaking and letting the mug cake rest for one minute before eating. The center will continue to set just enough while staying soft and molten.
Yes. You can swap the protein powder for unsweetened cocoa powder. The texture will still be rich and fudgy, just with less protein.
Use a deep microwave safe mug or a small ramekin. The batter rises as it cooks, so leaving space at the top helps prevent overflow.
Yes. Baking gives you firmer edges and a gooey center. Bake at 350°F for 10 to 12 minutes until the edges are set.
Chocolate chips, peanut butter chips, Nutella, or even a spoonful of nut butter all work well for a molten center.
You May Also Like
Molten Brownie Mug Cake
Ingredients
- 1 scoop chocolate protein powder
- 2 tbsp oat flour or all-purpose flour
- 2 tbsp maple syrup or honey
- ¼ cup milk of choice
- 1 tbsp melted butter or coconut oil
- ¼ tsp baking powder
- ½ tsp vanilla extract
- 1 square dark chocolate or 1 tbsp chocolate chips
Instructions
- In a microwave-safe mug or oven-safe ramekin, stir together protein powder/cocoa powder, flour, maple syrup, milk, melted butter, baking powder, and vanilla until smooth.
- Press the chocolate square or chips into the center of the batter.
- Microwave option: Heat for 50–60 seconds until the edges are set but the center is still slightly gooey.
- Oven option: Bake at 350°F for 10–12 minutes, until just set around the edges and gooey in the middle.
- Let sit for 1 minute before digging in. Top with ice cream, Greek yogurt, or peanut butter if you’re feeling wild.
This was absolutely delectable and so easy to make ? It’s a great single portion (quite filling though). Tysm for this amazing recipe!!
This was so good!!! Will definitely keep in my recipe stash for when I have a sweet tooth. I threw it in the oven right before I got the kids in their pj’s and was ready as soon as they were tucked in!
Hi! How much cocoa powder should I use if I’m swapping out the protein powder?
start with a 1/4 cup and adjust as needed!
Could I use vanilla protein powder and cocoa powder? If so how much of each?
Yes! you’ll do about half scoop protein powder and then 1 tbsp cocoa powder!