Homemade Granola
Homemade granola is one of those gifts that feels both thoughtful and practical. It’s something people actually use, it keeps well, and it works for breakfast, snacks, and even dessert. This version is the granola I make on repeat—simple ingredients, perfectly crunchy clusters, and just sweet enough without being overpowering.

For The Gift Guide You Can Make, I love granola because it checks every box: it’s budget-friendly, easy to batch, and looks beautiful packaged in a jar with a handwritten tag. Whether you’re gifting to neighbors, teachers, hosts, or friends, a jar of homemade granola always feels intentional without being overcomplicated.
Why You’ll Love This Homemade Granola
- Perfectly crunchy with real clusters thanks to pressing it before baking
- Refined-sugar-free, naturally sweetened with maple syrup or honey
- Easy to customize with nuts, seeds, dried fruit, or chocolate
- Great shelf life, making it ideal for gifting
- Works for breakfast, snacks, and yogurt bowls
- Makes multiple jars at once for stress-free gifting
Ingredients
Old-fashioned rolled oats:
These create the base of the granola and give it that classic, hearty crunch. Be sure to use rolled oats, not quick oats, for the best texture.
Raw nuts (almonds, pecans, or walnuts):
Add richness, crunch, and protein. You can use one variety or a mix depending on what you have on hand.
Unsweetened shredded coconut:
Adds subtle sweetness and toasty flavor without overpowering the granola.
Coconut oil (melted):
Helps the granola crisp up evenly and adds a light, buttery richness. Avocado oil works as a neutral substitute.
Maple syrup or honey:
Naturally sweetens the granola and helps create those bakery-style clusters.
Vanilla extract:
Adds warmth and depth and makes the granola taste more “finished.”
Cinnamon:
Optional, but adds cozy flavor that works beautifully for gifting.
Fine sea salt:
Balances the sweetness and brings out all the flavors.
Optional add-ins (after baking):
Dried cranberries, raisins, chopped dates, chocolate chips, or freeze-dried fruit.
Ingredient Swaps
No coconut oil -> Use avocado oil or melted butter.
Nut-free -> Replace nuts with pumpkin seeds and sunflower seeds.
Want extra protein? -> Add hemp seeds or chia seeds.
Prefer it sweeter? -> Increase maple syrup by 1–2 tablespoons.
Lower sugar -> Reduce maple syrup slightly and skip dried fruit.
Equipment Needed
- Large mixing bowl
- Measuring cups and spoons
- Rimmed baking sheet
- Parchment paper
- Spatula
- Airtight jars for gifting (16 oz jars work beautifully)
How to Make Homemade Granola
Step 1: Start with the coconut sugar.
This gives the granola its warm, caramelized sweetness and helps everything toast evenly in the oven. Coconut sugar also dissolves smoothly once it’s mixed with the oil and honey, so you don’t end up with gritty pockets.
Step 2: Add the dry base ingredients.
In a large bowl, combine the rolled oats, chopped nuts, seeds, cinnamon, and salt. Mixing the dry ingredients first ensures the spices and salt are evenly distributed before adding anything wet.
Step 3: Stir together the wet ingredients.
In a separate bowl, whisk together the melted coconut oil, honey (or maple syrup), and vanilla extract. This mixture is what coats the oats and creates those golden, crunchy clusters once baked.
Step 4: Combine everything thoroughly.
Pour the wet ingredients over the dry ingredients and stir until every oat and nut is evenly coated. Take your time here — even coverage is the key to granola that bakes evenly and forms good clusters.
Step 5: Spread into an even layer.
Transfer the mixture to a parchment-lined baking sheet and press it gently into an even layer. Pressing it down slightly helps encourage larger granola clusters as it bakes.
Step 6: Bake until golden.
Bake at 325°F, stirring once halfway through, until the granola is lightly golden and smells toasted. Keep an eye on it toward the end — granola can go from perfect to overdone quickly.
Step 7: Cool completely before breaking apart.
This step is crucial. Let the granola cool fully on the baking sheet without stirring. As it cools, it firms up and creates those crunchy clusters everyone loves.
Step 8: Add any mix-ins.
Once cooled, stir in dried fruit, chocolate chips, or coconut flakes if using. Adding these after baking prevents burning and keeps the textures just right.
Step 9: Break into clusters and store.
Break the granola into clusters and transfer to jars for gifting or airtight containers for storage.
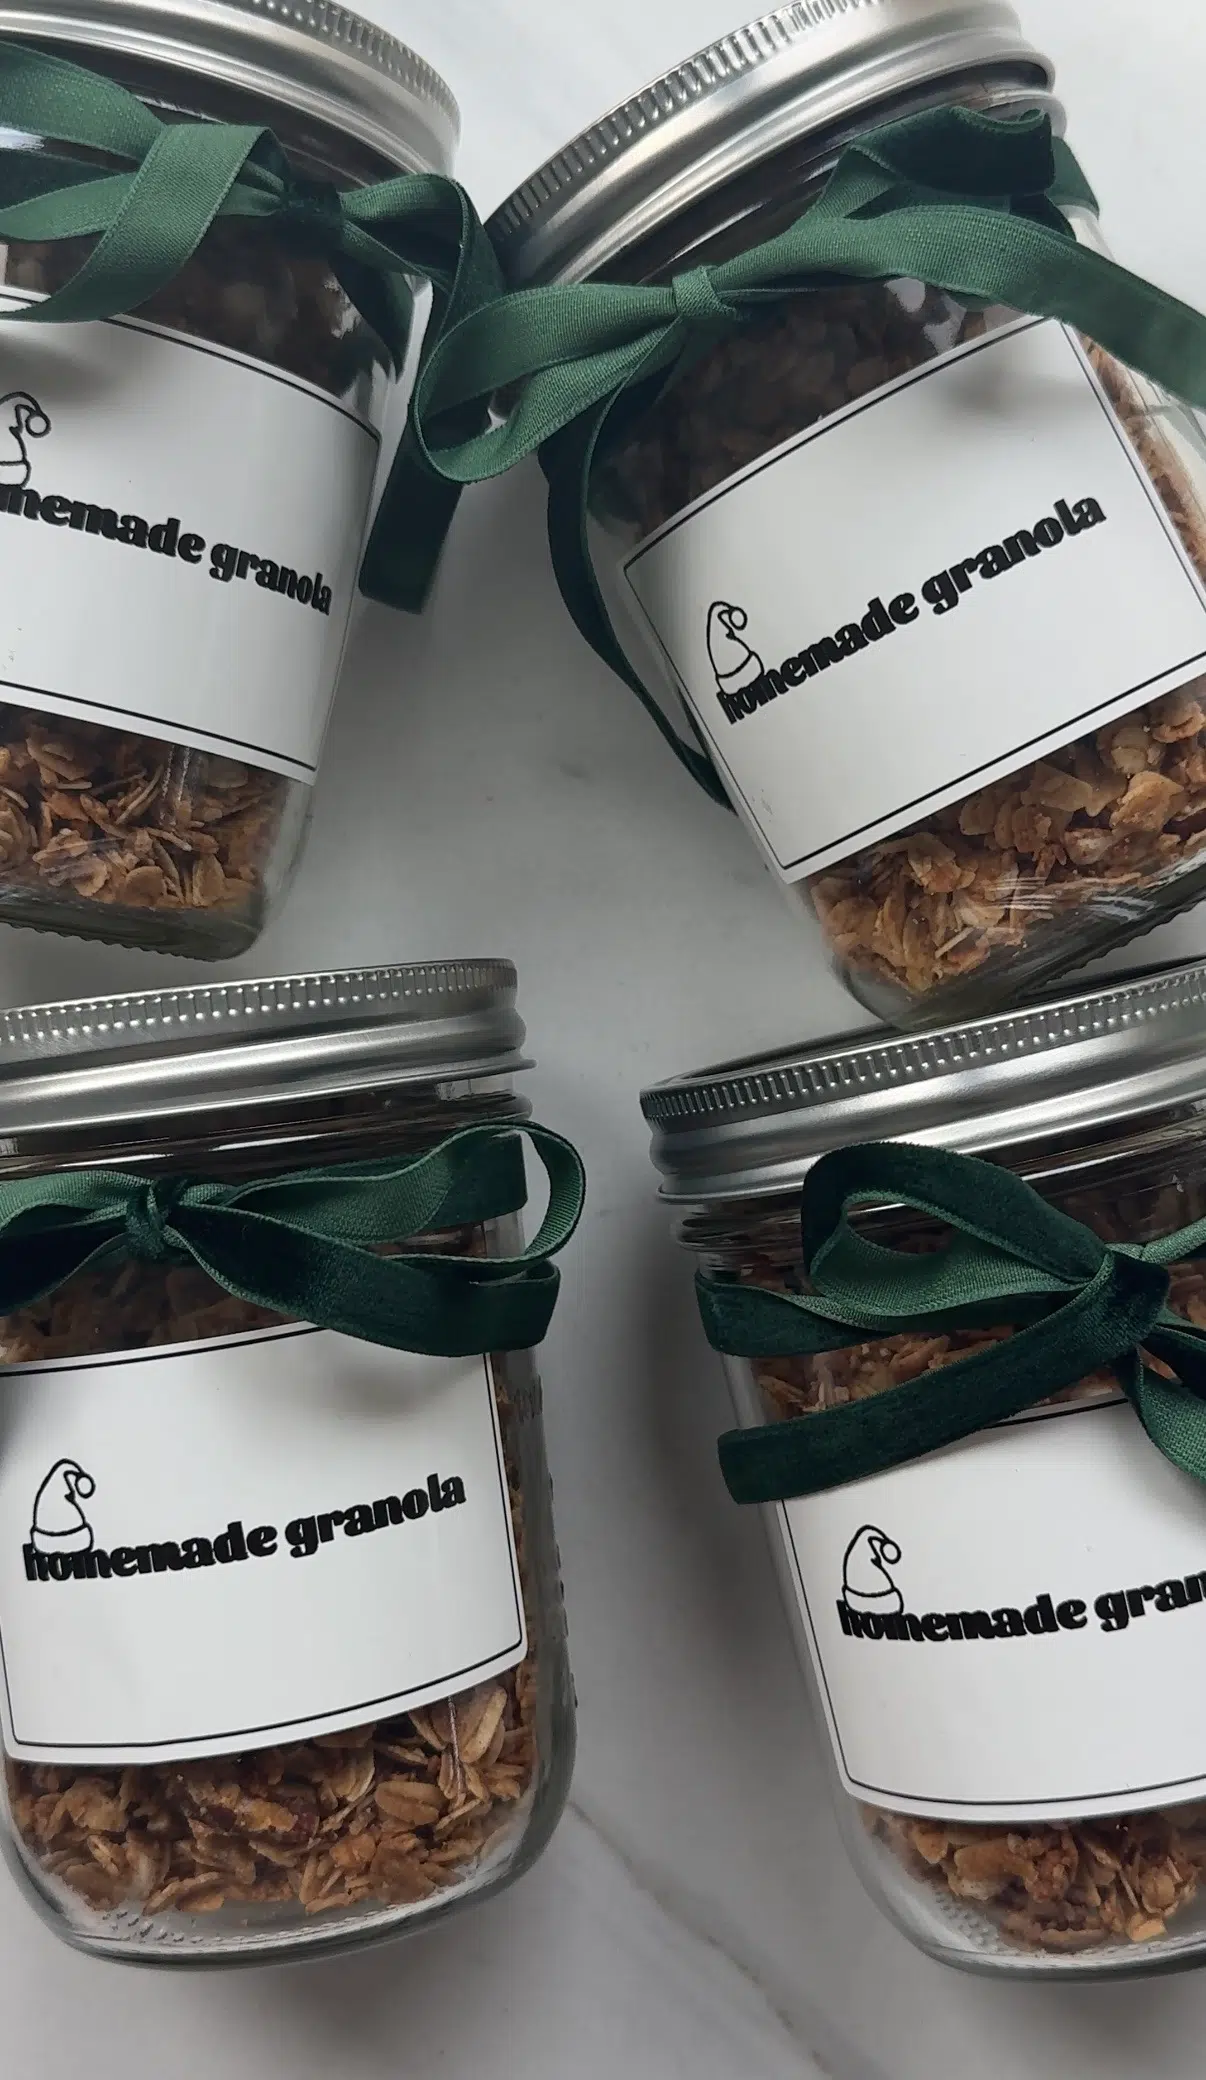
How to Package Granola for Gifting
Tie with twine or ribbon for a simple, cozy look.
Use 16 oz jars for gifting (this recipe fills about 3 jars).
Let granola cool completely before transferring to jars.
Add a kraft label or handwritten tag with serving ideas.
How to Package Granola for Gifting
- Use 16 oz jars for gifting (this recipe fills about 3 jars).
- Let granola cool completely before transferring to jars.
- Add a kraft label or handwritten tag with serving ideas.
- Tie with twine or ribbon for a simple, cozy look.
Storage & Shelf Life
Store in an airtight container at room temperature
Keeps fresh for 2–3 weeks
For longer storage, refrigerate up to 1 month
Granola can also be frozen for up to 3 months
Troubleshooting
Granola isn’t crunchy: It needs more bake time or wasn’t pressed firmly enough.
Burning on the edges: Bake at a lower rack and rotate halfway through.
Too crumbly: Press more firmly and avoid stirring while baking.
Frequently Asked Questions
This recipe makes about 3 (16 oz) jars, perfect for gifting.
Yes, use seeds instead of nuts.
Absolutely, use two baking sheets and rotate pans halfway.
Usually, yes. This version uses simple ingredients and no refined sugar.
You May Also Like
Homemade Granola
Ingredients
- 3 cups old-fashioned rolled oats
- ¾ cup chopped nuts pecans, almonds, or walnuts
- ½ cup coconut flakes
- ? cup coconut sugar
- ¼ cup maple syrup or honey
- ¼ cup melted coconut oil or butter
- 1 teaspoon vanilla extract
- 1 teaspoon cinnamon
- ½ teaspoon fine sea salt
Optional add-ins (after baking):
- dried cranberries
- chocolate chips
- chopped dates
Instructions
- Preheat oven to 325°F and line a baking sheet with parchment paper.
- In a large bowl, combine the rolled oats, chopped nuts, coconut flakes, coconut sugar, cinnamon, and salt.
- Pour in the maple syrup, melted coconut oil, and vanilla extract. Stir well until everything is evenly coated.
- Spread the mixture evenly onto the prepared baking sheet. Bake for 25–30 minutes, stirring once halfway through, until golden.
- Let the granola cool fully on the pan. It will crisp up as it cools.
- Once cooled, stir in any dried fruit or chocolate chips.
Notes
- For extra crunch, press the granola firmly onto the pan before baking and avoid stirring too much.
- For cluster-style granola, let it cool undisturbed before breaking into pieces.
- Use maple syrup for a lighter flavor or honey for deeper sweetness.
- This recipe doubles easily for gifting.
Storage
- Store in an airtight container or jar at room temperature.
- Keeps fresh for up to 3 weeks.
- For longer storage, freeze for up to 3 months.