Homemade Brownie Mix
Brownies are one of those universal, guaranteed crowd-pleasers, which is exactly why this Homemade Brownie Mix in a Jar has quickly become one of my favorite gifts to make. It’s rich, chocolatey, compact enough to tuck into a gift basket, and takes less than 10 minutes to assemble. And once someone bakes it? It tastes like the kind of brownie that disappears from the pan within hours.

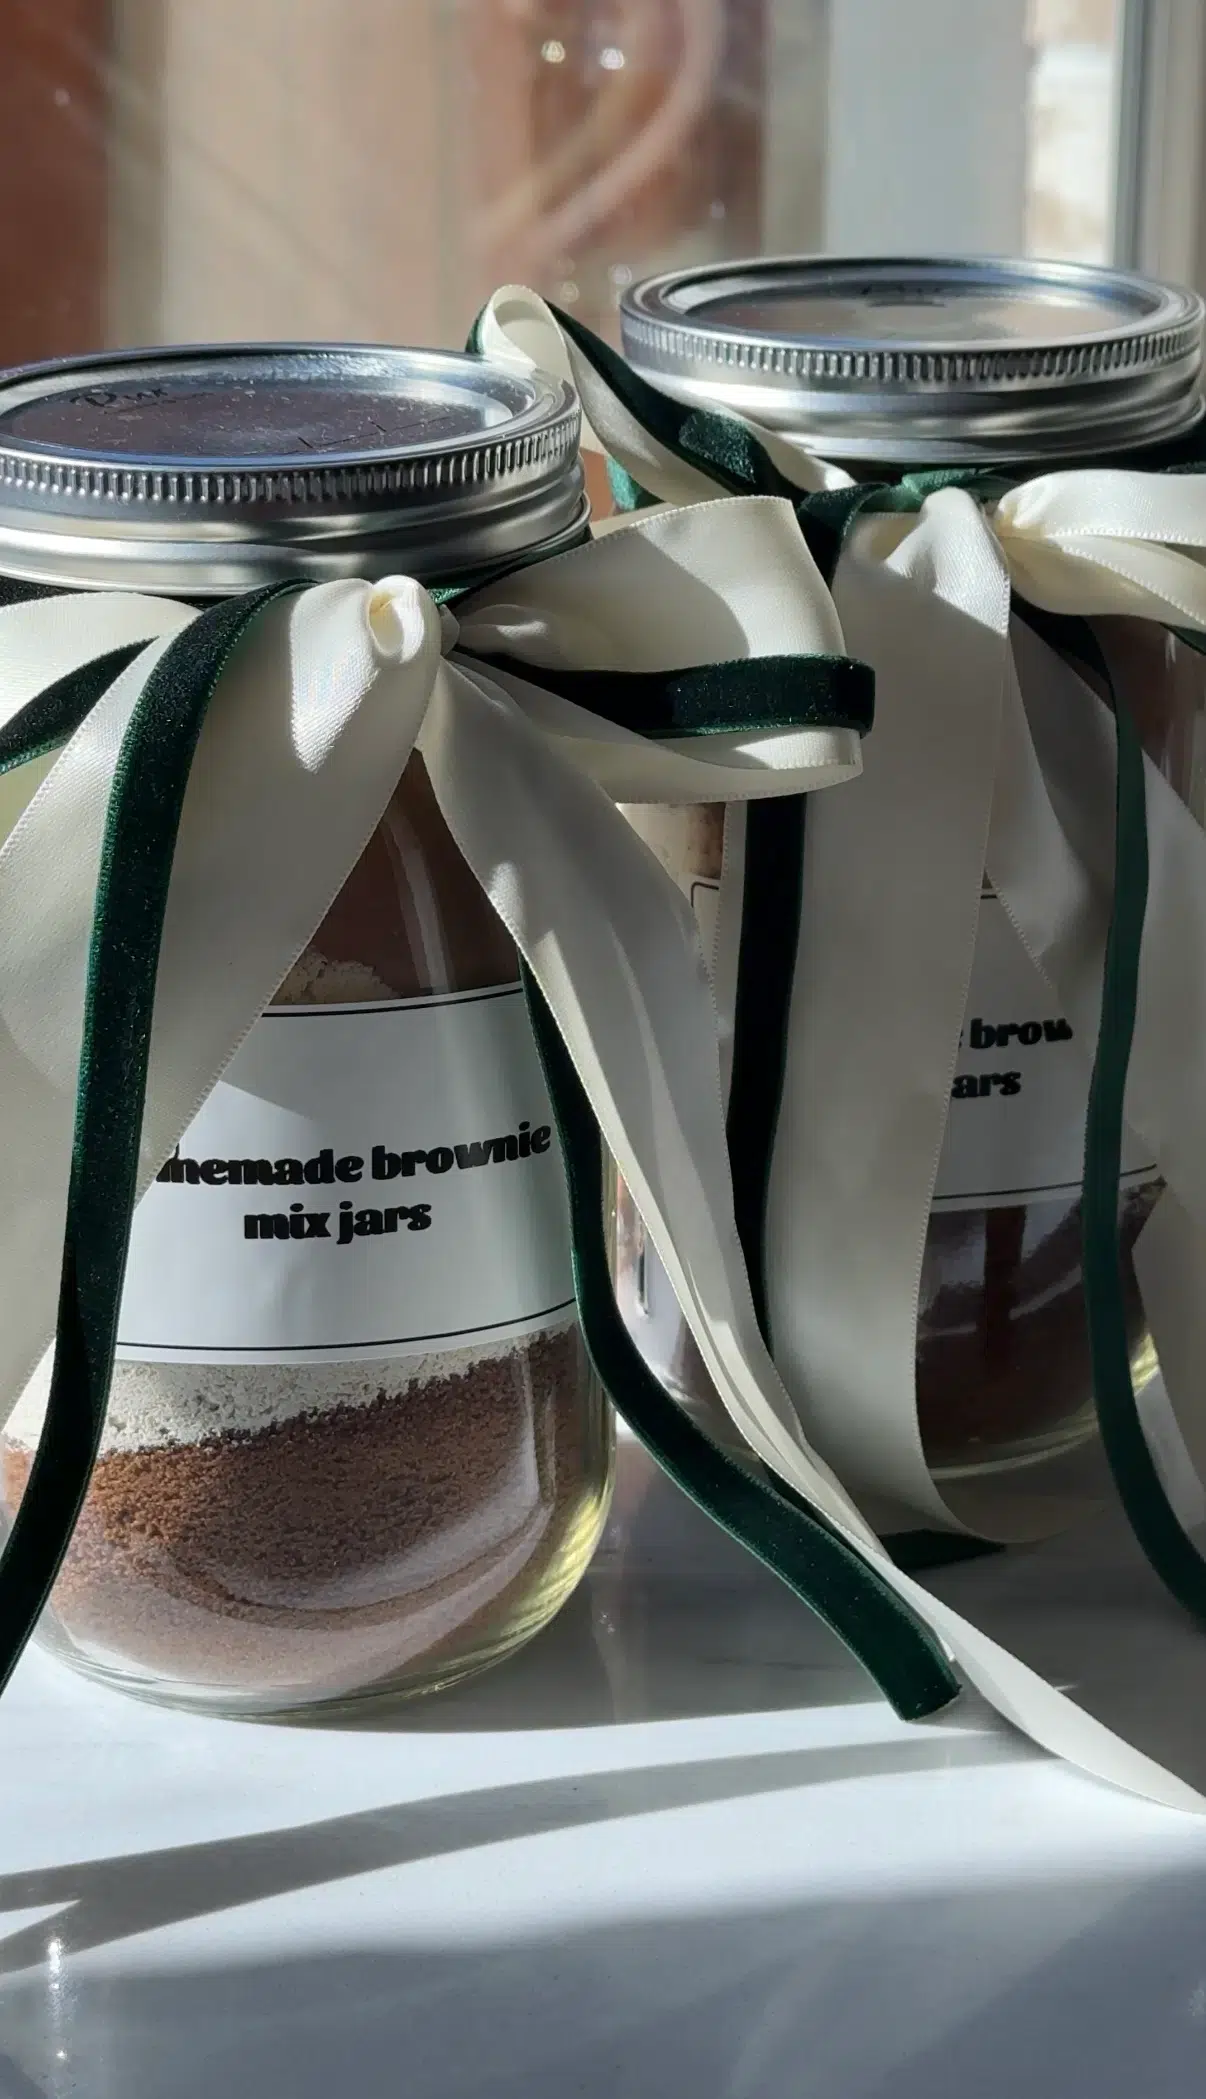
What I love most about this mix is how beautifully it layers in a clear jar. The cocoa, coconut sugar, and flour settle into the prettiest bakery-style stripes, and once you tie a ribbon around the top or add a handwritten label, it instantly looks elevated. This is the definition of a thoughtful gift under $15—simple ingredients, quick assembly, and something people will genuinely make and enjoy. Perfect for teachers, neighbors, hosts, or anyone who loves a cozy homemade treat.
Why You’ll Love This Homemade Brownie Mix
- Fudgy, rich brownies every time. The almond flour keeps them tender and the coconut sugar gives that deep, caramel-like sweetness.
- Layers beautifully. Every ingredient creates a natural stripe so the jar looks boutique-worthy.
- Refined-sugar-free. Sweetened only with coconut sugar.
- Budget-friendly. An elevated holiday gift under $15.
- Takes 5 minutes to assemble. Perfect for batch gifting.
- Easy to bake. Recipients only add pantry staples (eggs, melted butter, milk, vanilla).
- Customizable. Add chocolate chips, crushed peppermint, or freeze-dried raspberries.
Ingredients
Coconut sugar:
Naturally sweetens the brownies without refined sugar. It adds a warm, caramel-like depth that pairs perfectly with chocolate.
Almond flour:
Creates a rich, soft, slightly chewy texture—key for a fudgy brownie instead of a cakey one.
Cocoa powder:
Use unsweetened cocoa powder for a deep chocolate flavor. You can also use a darker cocoa for a more intense result.
Oat flour:
Lightens the brownies slightly so they’re not overly dense. It also blends smoothly into the jar and batter.
Fine sea salt:
Balances the sweetness and brings out the chocolate flavor.
Baking powder:
Gives the brownies just enough lift so they’re fudgy but not flat.
Chocolate chips (optional):
Adding a top layer creates a pretty finish and extra melty pockets of chocolate.
Wet ingredients to add:
Eggs, melted butter or coconut oil, milk of choice, and vanilla give the brownies their rich, gooey texture.
Ingredient Swaps
No almond flour? -> Use 1 cup oat flour (brownies will be slightly less rich).
Want it dairy-free? -> Use coconut oil and dairy-free milk.
Prefer darker brownies? -> Use dark cocoa powder or add 1–2 tbsp espresso powder.
Want them sweeter? -> Add 2 extra tablespoons coconut sugar to the jar.
No oat flour? -> Use ½ cup all-purpose flour or gluten-free 1:1.
For extra chocolate: -> Increase chocolate chips to ¾ cup.
Equipment Needed
- Three 32 oz (1 quart) mason jars
- Funnel (keeps layers clean)
- Small bowl
- Ribbon or twine
- Printable or handwritten gift tags
- Measuring cups
How to Make Brownie Mix Jars
Step 1: Start with the coconut sugar.
This creates the darkest base layer and prevents finer flours from sinking.
Step 2: Add the oat flour.
This creates a lighter, soft stripe in the jar.
Step 3: Add the almond flour.
Spoon gently and level for clean edges.
Step 4: Add the cocoa powder.
Pour slowly using a funnel to prevent dusting the jar walls.
Step 5: Mix the baking powder + sea salt.
Stir together in a small bowl before adding so the layer stays clean and even.
Step 6: Finish with the chocolate chips.
Adding them on top makes the jar look polished and gift-ready.
Step 7: Seal and label.
Add a ribbon and tie on baking instructions.
Jar Layering Instructions
To get perfect, crisp stripes:
- Use a completely dry jar and funnel.
- Add each ingredient slowly and avoid shaking the jar.
- Tap gently only after each layer to level it.
- Wipe down jar walls with a dry towel if any powder sticks.
- Leave a little headspace for a clean top.
A 32 oz jar is the perfect size, it fills nicely without overflowing.
How to Bake the Brownies (Gift Tag Instructions)
- Preheat oven to 350°F.
- Pour the jar into a large bowl and whisk to combine.
- Add:
- 2 eggs
- ? cup melted butter or coconut oil
- ¼ cup milk
- 2 teaspoons vanilla
- Mix until just combined—do not overmix.
- Pour into a greased or lined 8×8 baking dish.
- Bake 22–28 minutes, until set around the edges but soft in the center (for fudgy brownies).
Storage & Shelf Life
Mix stays fresh 6 months in a sealed jar.
Best stored in a cool, dark pantry.
If using chocolate chips, keep away from sunlight so they don’t melt.
After baking, brownies stay fresh 4 days or freeze up to 2 months.
Tips For Success
Brownies too cakey: Too much milk or overmixed batter. Use exactly ¼ cup milk and mix gently.
Brownies too dry: Overbaked. Pull them when the center still looks slightly soft.
Brownies too thin: Use an 8×8 dish (not 9×13), or reduce milk to 2 tablespoons for extra fudgy brownies.
Layers blended while assembling: Add each ingredient slowly and wipe jar walls between layers.
Batter looks grainy: Almond flour texture is normal—once baked, brownies turn fudgy.
Frequently Asked Questions
Up to 6 months in a sealed jar stored at room temperature.
Yes, use gluten-free oat flour and ensure chocolate chips are GF.
Yes! The mix is sweetened with coconut sugar only.
Yes, add after the jar is poured into the bowl right before baking.
You May Also Like
Brownie Mix in a Jar (Easy Edible Gift)
Ingredients
- 1 cup coconut sugar
- 1 cup almond flour
- ¾ cup cocoa powder
- ½ cup oat flour
- ½ teaspoon fine sea salt
- 1 teaspoon baking powder
- Optional: ½ cup chocolate chips
Wet Ingredients To Add:
- 2 eggs
- 1/3 cup melted butter or coconut oil
- ¼ cup milk
- 2 teaspoons vanilla
Instructions
- Layer coconut sugar, almond flour, cocoa powder, oat flour, baking powder + salt, then chocolate chips into a 32 oz jar.
- Seal the jar, add a tag, and gift.
- To bake: Whisk jar mix, add eggs, melted butter, milk, and vanilla.
- Bake at 350°F for 22–28 minutes.
Notes
- Jar Size: A 32 oz mason jar fits all ingredients with a little room at the top for a clean, gift-ready presentation.
- Layering Tips: Add ingredients slowly using a dry funnel for the cleanest layers. Tap the jar gently between each layer to settle the mix without blending the colors.
- Chocolate Chips: Adding chocolate chips to the very top gives the jar a finished, bakery-style look and melts into extra fudgy pockets once baked.
- Dairy-Free Option: Use coconut oil instead of butter and any non-dairy milk to keep the brownies completely dairy-free.
- Gluten-Free Option: This mix is naturally gluten-free using oat flour and almond flour, but make sure your oat flour is certified gluten-free.
- Sweeter Brownies: Add an extra ¼ cup chocolate chips to the batter when baking.
- Cakier Texture: Add 2 tablespoons extra milk to the batter for a slightly lighter, cakier finish.
- Fudgier Texture: Reduce the milk to 2 tablespoons and underbake by 1–2 minutes.
- Gift Tag Tip: Include “Add 2 eggs, ? cup melted butter or coconut oil, ¼ cup milk, 2 tsp vanilla” on a small tag so the jar is truly grab-and-go for the recipient.
- Storage: The dry mix keeps for 4–6 months in a cool, dry pantry. Once baked, brownies stay fresh for 3–4 days or freeze well for up to 2 months.